Ghorm the Devourer
| Ghorm the Devourer | |
|---|---|

| |
| Location | The Clay Caves The Forgotten Ruins |
| Scanner | |
| Aggressive | Yes |
| Faction | AttacksAllButNotAttacked |
| Health | 8,061 |
| Pre-spawned | Yes |
| Summon item | |
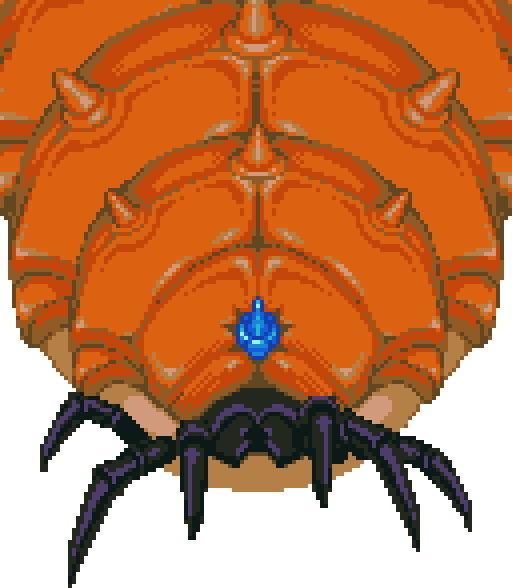
Ghorm the Devourer is one of the three Bosses of early game. It continuously circles the core, through the inner regions of The Clay Caves and The Forgotten Ruins biomes.
When defeated, Ghorm will drop ![]() Ghorm's Horn, one of the three items required to power up The Core. Once emplaced in its Boss Statue, the world save file is marked with this item icon.
Ghorm's Horn, one of the three items required to power up The Core. Once emplaced in its Boss Statue, the world save file is marked with this item icon.
Spawn[edit]
Ghorm's slightly undulating circular path can be found at a distance of approximately 220 tiles from The Core. This is about half way to the Great Wall and slightly beyond the edge of the inner Dirt Biome area. You can use this measurement against any other bosses for reference. The track is approximately 8 tiles wide, filled with Ground Slime.
Ghorm takes 4 minutes to complete one orbit and will destroy any map features in its path, its first time around. This may even include the Obsidian Walls of maze Scenes, if one is generated in front of it. Or is close by during the second boss fight phase.
![]() Ghorm the Devourer Scanner can be used to locate its position on the map. This is initially unnecessary, given that players will always come across its track, moving outwards in any direction. But after killing it, for the first time, the map icon will show the location of its respawn rune spot. This will be slightly outside the track, at a random angle.
Ghorm the Devourer Scanner can be used to locate its position on the map. This is initially unnecessary, given that players will always come across its track, moving outwards in any direction. But after killing it, for the first time, the map icon will show the location of its respawn rune spot. This will be slightly outside the track, at a random angle.
To respawn Ghorm, place a ![]() Ghorm Summoning Idol on its rune circle. The idol can be purchased from the Caveling Merchant for 500
Ghorm Summoning Idol on its rune circle. The idol can be purchased from the Caveling Merchant for 500![]() . Merchant NPCs restock their item inventory after some time has passed.
. Merchant NPCs restock their item inventory after some time has passed.
Behavior[edit]
Unlike other bosses, Ghorm is constantly moving, circling the core every 4 minutes. Ghorm cannot be trapped or slowed with walls or by removing ground; this giant Larva boss creates unlimited new Dirt Ground and Ground Slime beneath itself.
Its path is only interrupted by damaging it to 70% health within one loop. At this point Ghorm enrages, charging the player directly and turn back tightly once off screen. This will destroy everything in a sizeable area, within a limited range of its original path.
Canonically Ghorm is a giant larva, but it will kill all Enemies in its path. NPCs too, if they happen to be there.
Passive[edit]
- Immune to being slowed by slime
- Immune to acid damage
- Immune to stun
- Immune to slippery movement
Drops[edit]
| Item | Chance per roll | Chance for 1 or more |
|---|---|---|
| Guaranteed | ||
| 1 roll | ||
| 50% | ||
| 20% | ||
| 20% | ||
| 10% | ||
| 3-5 rolls | ||
| 15.71% | 49.51% | |
| 15.71% | 49.51% | |
| 20.73% | 60.52% | |
| 20.94% | 60.94% | |
| 10.47% | 35.75% | |
| 5.24% | 19.35% | |
| 5.24% | 19.35% | |
| 2.09% | 8.12% | |
| 2.09% | 8.12% | |
| 1.05% | 4.12% | |
| 0.52% | 2.08% | |
| 0.21% | 0.84% | |
Strategy[edit]
Recommended gear[edit]
- Equipment: Iron Anvil armor and weapons or better.
- Accessories: Movement boost from
 Swift Ring and
  Swift Feather. Optionally
  Grub Egg Necklace and
  Larva Ring set, for immunity to slime slow.
 - Consumables: Cooked food including
 Bomb Pepper for move speed and optionally
  Yellow Blister Head for immunity to slime slow.
Spikes (Safest)[edit]

Craft at least 100-120 ![]() Spike Trap, for a single player. To account for boss health scaling, add 20% more for each additional player and double up for a hard mode world. Be aware almost all of these will be destroyed if they are the main or only source of damage!
Spike Trap, for a single player. To account for boss health scaling, add 20% more for each additional player and double up for a hard mode world. Be aware almost all of these will be destroyed if they are the main or only source of damage!
Wait near the Ghorm track, then once it passes you have 4 minutes to prepare. Quickly remove Ground Slime with a shovel, to make player movement easier, if you don't have immunity via the recommended gear or food.
Then cover the track with spikes, across its width. This is a guaranteed method to safely burst Ghorm down to enraged health. Now you enter the bull-fighting stage - stand in or behind the remaining traps to bait Ghorm into charging them, too. Adding damage with a ranged weapon, as you like.
In theory, ![]() Hive Spike Trap could also work, instead. But their damage is significantly less, so you'd need at least 160-190, which would take a lot of time to scavenge. They hurt players too, so extra care would be needed to avoid them.
Hive Spike Trap could also work, instead. But their damage is significantly less, so you'd need at least 160-190, which would take a lot of time to scavenge. They hurt players too, so extra care would be needed to avoid them.
Bombs (Risky)[edit]
Alternatively, or in addition, to reduce the number of traps destroyed, bring 20-30 ![]() Bombs. Quickly place them on the track as you hear Ghorm approach and see the screen shake. These will explode on contact, or after their set time. So be very careful not to leave it too late, as they do significantly more damage to players than Ghorm itself. 7 hits should be enough to enrage Ghorm, in theory, and 23 to kill. But landing bombs in the second phase of the fight may be particularly tricky and dangerous.
Bombs. Quickly place them on the track as you hear Ghorm approach and see the screen shake. These will explode on contact, or after their set time. So be very careful not to leave it too late, as they do significantly more damage to players than Ghorm itself. 7 hits should be enough to enrage Ghorm, in theory, and 23 to kill. But landing bombs in the second phase of the fight may be particularly tricky and dangerous.
Melee or Ranged Only[edit]
With added movement speed and slow from ground slime avoided, players can kite backwards in front of Ghorm, using a ranged weapon.
To make this easier, especially for melee: mine the walls and add bridges over water on the inside of the Ghorm track. Then attack directly while running along side, without getting hit, during the first phase. Or build a Rail track here, so you can do this in style, from a Minecart. Until Ghorm enrages.
If taking you first Ghorm fight using only conventional weapons, both phases will take longer than with traps. So, especially with a melee approach, more sustain may be needed, from Healing Potions and food. Additional armor and a Wooden Shield could be used to tank hits, if player is unable to move out of the way effectively. E.g. once Ghorm covers the area in slime again.
However, dodging should always be possible. Chasing Ghorm's tail, as it receeds, can allow you to hit additional damage and then more easily side-step its next pass - moving towards the opposite direction to exploit its restricted turning circle.
The most efficient early game weapon for killing and farming Ghorm is the ![]() Grubzooka. Its projectile pierces, hitting multiple segments of the boss. But is only accessible if defeating The Hive Mother first.
Grubzooka. Its projectile pierces, hitting multiple segments of the boss. But is only accessible if defeating The Hive Mother first.
